Introduction
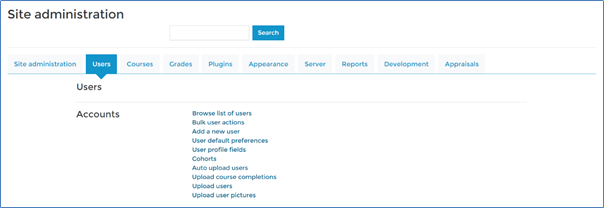
Most of the functions for managing users are found under Site administration > Users > Accounts.
Finding
Users on the LMS can be found under Site administration > Users > Accounts> Browse list of users. From here you can see all the users and use the filter options to find specific users.
Creating and editing users
You can create users manually by going to: Site administration > Users > Accounts > Add a new user. You can manually upload users through the Upload users function.
You can edit users by finding them on the LMS through the Browse list of users function explained above. You can then view a user’s record by clicking on their name. To edit a user’s record, then click on the cog icon.
User profilesTest Post
Your users will have specific profile fields that relate to their position within the organisation, e.g. job title, job role, team, department, area etc. These fields are populated when the users are created or amended. The data is stored in the user’s profile as Other fields and can be seen at the bottom of the user’s profile page. These profile fields are very important, as they determine how you can create groups in the LMS and how you can report out user progress from the LMS.
Users roles
Some roles are system wide and other roles can be at category or course level. The most common roles in the LMS are shown below:
- Student. The normal role for anyone enrolled onto the course in order to access the materials.
- Group manager. This role exists so managers can then be assigned to a group or groups of users on the LMS for access to reports and other functions.
- Systems manager (i.e. the main LMS administrator). Systems managers can access all users, all courses and all groups and reports on the LMS. They can also update the user dashboard by adding, removing or editing the blocks and their positions.
Group managers and Systems managers are assigned their roles at the system level by going to: Site administration > Users > Permissions and select Assign system roles.